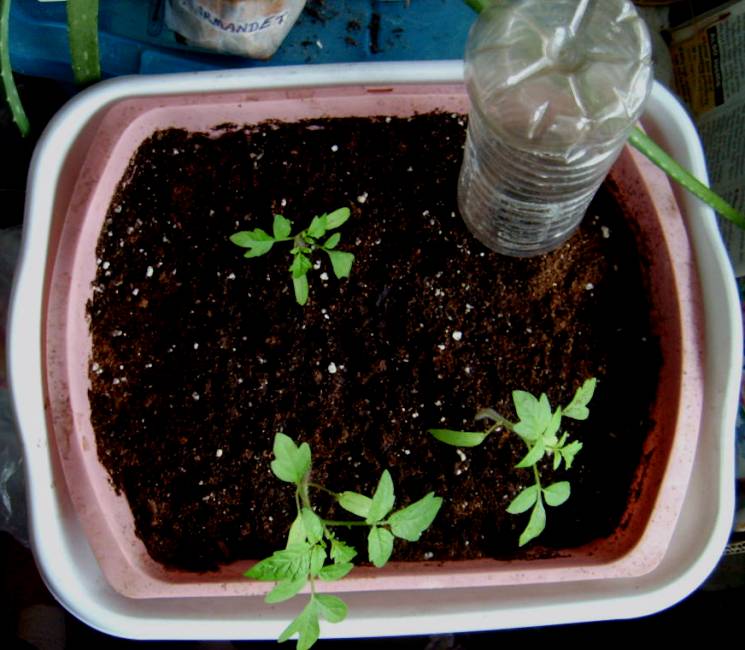
Here is my first Sub Irrigating Planter with small Tomato plants. I still need to add plastic over the potting mix and it will be complete. As the tomatoes grow I may need to re-pot them in deeper SIP's. But this will get them started until the weather warms up and they can be moved outside. It is a practice SIP for me to get the hang of it.
Sub Irrigated Planters conserve water, save time, and make happy plants! You can grow your own food anywhere there is sun, a patio, a sidewalk, driveway, and do not take much space. They can be easily moved or taken with you if you ever need to move or evacuate in a hurry. They conserve water because water is stored in the lower tub or bucket, perfect droughts. There is an overflow opening in the upper tub so you will never over water. The roots will get the air they need, and water available when ever they need it.
SIP's can be set on a bench, shelf, or blocks so you do not have to bend. Wow, no bending, no weeding, no tilling, water only when dry, the perfect way to grow produce!
Here is how I made the above Sub Irrigated Planter, SIP
Correct me if I am wrong, this is how I understand it. My plants are still alive, however I had one Tomato seedling wilt so I added more water and it is doing fine now.
Supplies needed:
1 plastic tub, any size
1 smaller plastic tub that will fit into the larger tub
1 water bottle or 1.5" to 3" PVC pipe for a fill tube
1 half gallon milk jug cut in half lengthwise
Peat moss potting mix with perlite (Dollar General for $3.00 a bag, this planter took 1/2 bag)
Plants or seeds
Awl to punch holes in the milk jug, keep fingers out of the way, one of mine got in the way, not paying attention, ouch!
Heavy duty scissors
1/4" drill bit or paddle bit and drill, any size will do as long as water can get out of the overflow
Heavy plastic to fit over the top
1. Poke a lot of small holes in the milk jug like Swiss cheese (for air space for roots). The lid is not needed .
2. Cut the milk jug in half length wise
3. Cut the bottom off the plastic bottle, I left about 1/2" still attached to keep debris out of it when it is outside.
4. Insert the fill tube: Cut a hole in one end of the milk jug and screw in the plastic bottle or PVC pipe.
5. Drill an overflow hole in the end of the upper tub about 4" up from the bottom, or at the height of the top of the milk jugs
6. Put small tub into larger tub
7. Add potting mix/starter mix
8. Add plants
9. One time only flood it with water until you see water start to come out of the overflow hole. This is the only time it needs to be flooded. You will fill it with the water bottle/PVC pipe fill tube from now on as needed.
10. Cover with clear or Black plastic, cutting holes or slits for plants. This will keep the potting mix from drying out to fast. Use clear plastic in hot weather and Black in cooler weather.
11. Look into the fill tube every few days to see if it needs more water. Fill as needed. How often it needs to be filled will depend on how hot it is in your area.
Fertilizer and nutrients can be added to the water when you first flood it and every time you refill it. I an using Kelp mixed in with rain water at the moment, and drying organic Banana peels and farm raised eggshells to make a natural fertilizer. I may throw in some dried Avocado peels also. Will post the recipe when I find it again.
Here is another website that can explain Sub Irrigated Planters better than me and show you pictures of the inside.
http://www.insideurbangreen.org/diy-sub-irrigation/
Overhead view of a sub-irrigated planter, SIP made from a green plastic tote.
Below is Re-grown Potato plants (see the previous post) in the second SIP I made with a large flower pot lined with plastic, and an inverted plastic bowl poked full of holes in the bottom, on top of the plastic liner. There is a hole cut in the plastic 4" up from the bottom for water over flow and a drip pan under it. A plastic bag is tied on with string. These will be put outside as soon as it warms up.
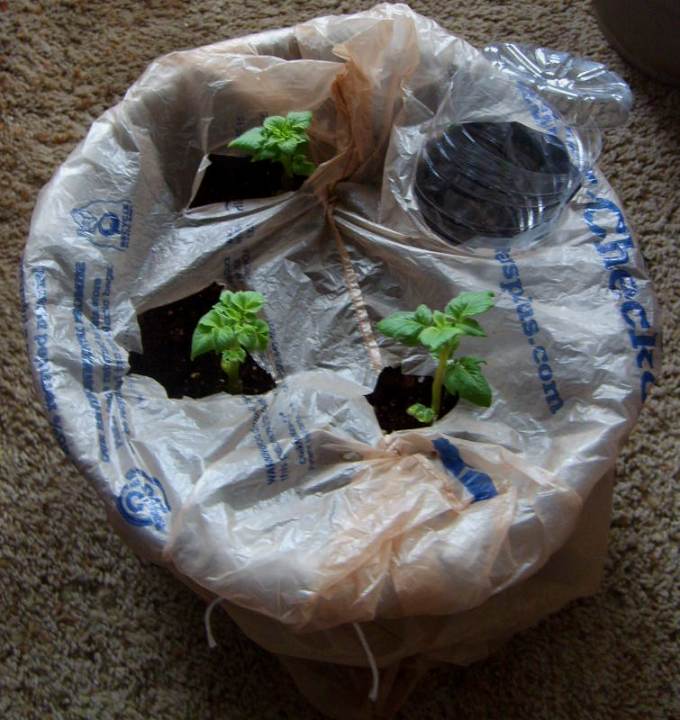
Potato plants regrown from eyes of organic Potatoes we ate, now growing in Sub Irrigated Planter, SIP. They look happy! Hope they give us some more Potatoes.
 RSS Feed
